Puff pastry is always a good idea. It’s flaky, it’s buttery, it’s tender yet crunchy. It’s so yummy! And, contrary to popular belief, it really isn’t hard to make.
**For this recipe, I am using puff pastry that I made previously and had in the freezer. I will be doing a post on making full puff pastry soon but this recipe does not include the ingredients or method for making the puff.**
When I make full puff pastry, I choose a day that I will be home for several hours. There is not a lot of work or active time with the pastry – most of the time spent making puff pastry is waiting for the dough to chill out. Literally. It needs to stay COLD so it spends a lot of time in the frig. Handle it gently and only when you need to. Get it back into the frig as soon as possible after each turn.
And take your time. You don’t want to make puff pastry when you are in a rush.
I use Anna Olson’s recipe for full puff pastry EXCEPT that I use the old-school method of putting the butter (or beurrage) inside the dough (or detrempe). Anna is a wonderful pastry chef and I love her recipes! But I have not tried her technique of folding the dough with the butter on the outside. I have heard other pastry chefs say they use this method too but, what can I say, I’m a traditional kind of girl!
So I used her recipe of ingredients but I roll out the dough, lay the butter block on top, and fold the dough around the butter to completely envelope it. Make sure to pinch the corners and seams of the dough to make sure that the butter will not come out of any of the seams when you start rolling. Anna’s recipe can be found HERE.
Once the pastry is complete, I cut it with a bench scraper into 3 even blocks, wrap each block in cling wrap and then in foil, then put all three wrapped blocks into a freezer bag. Use it within 3 months and thaw in the refrigerator before using.
I had a block of puff pastry left in the freezer and, after being out of town without a kitchen for the last week, I was definitely ready to bake some goodies today! I took the puff out of the freezer last night and thawed it in the frig overnight (it was really only about 5 hours – I couldn’t sleep!). Then I tried to figure out what to do with it.
There are so many options with puff pastry! Sweet, savory, a small bite or a full dish.
Since I had been out of town, my fresh fruit and vege choices were limited. I LOVE an asparagus quiche on puff pastry but had no asparagus. Berries with some cream cheese would make some tasty pastries but I didn’t have any fresh berries. (I have frozen but didn’t want to break into those just yet!)
I did have apples, though, so I threw together a quick apple filling and let it cool while I worked on a pan of cinnamon rolls (Yes, pastries and cinnamon rolls today – a girl has got to have options!). Make sure that your filling is completely cool before putting together the apple claws. If it is warm, it will start to melt the butter and we don’t want that!
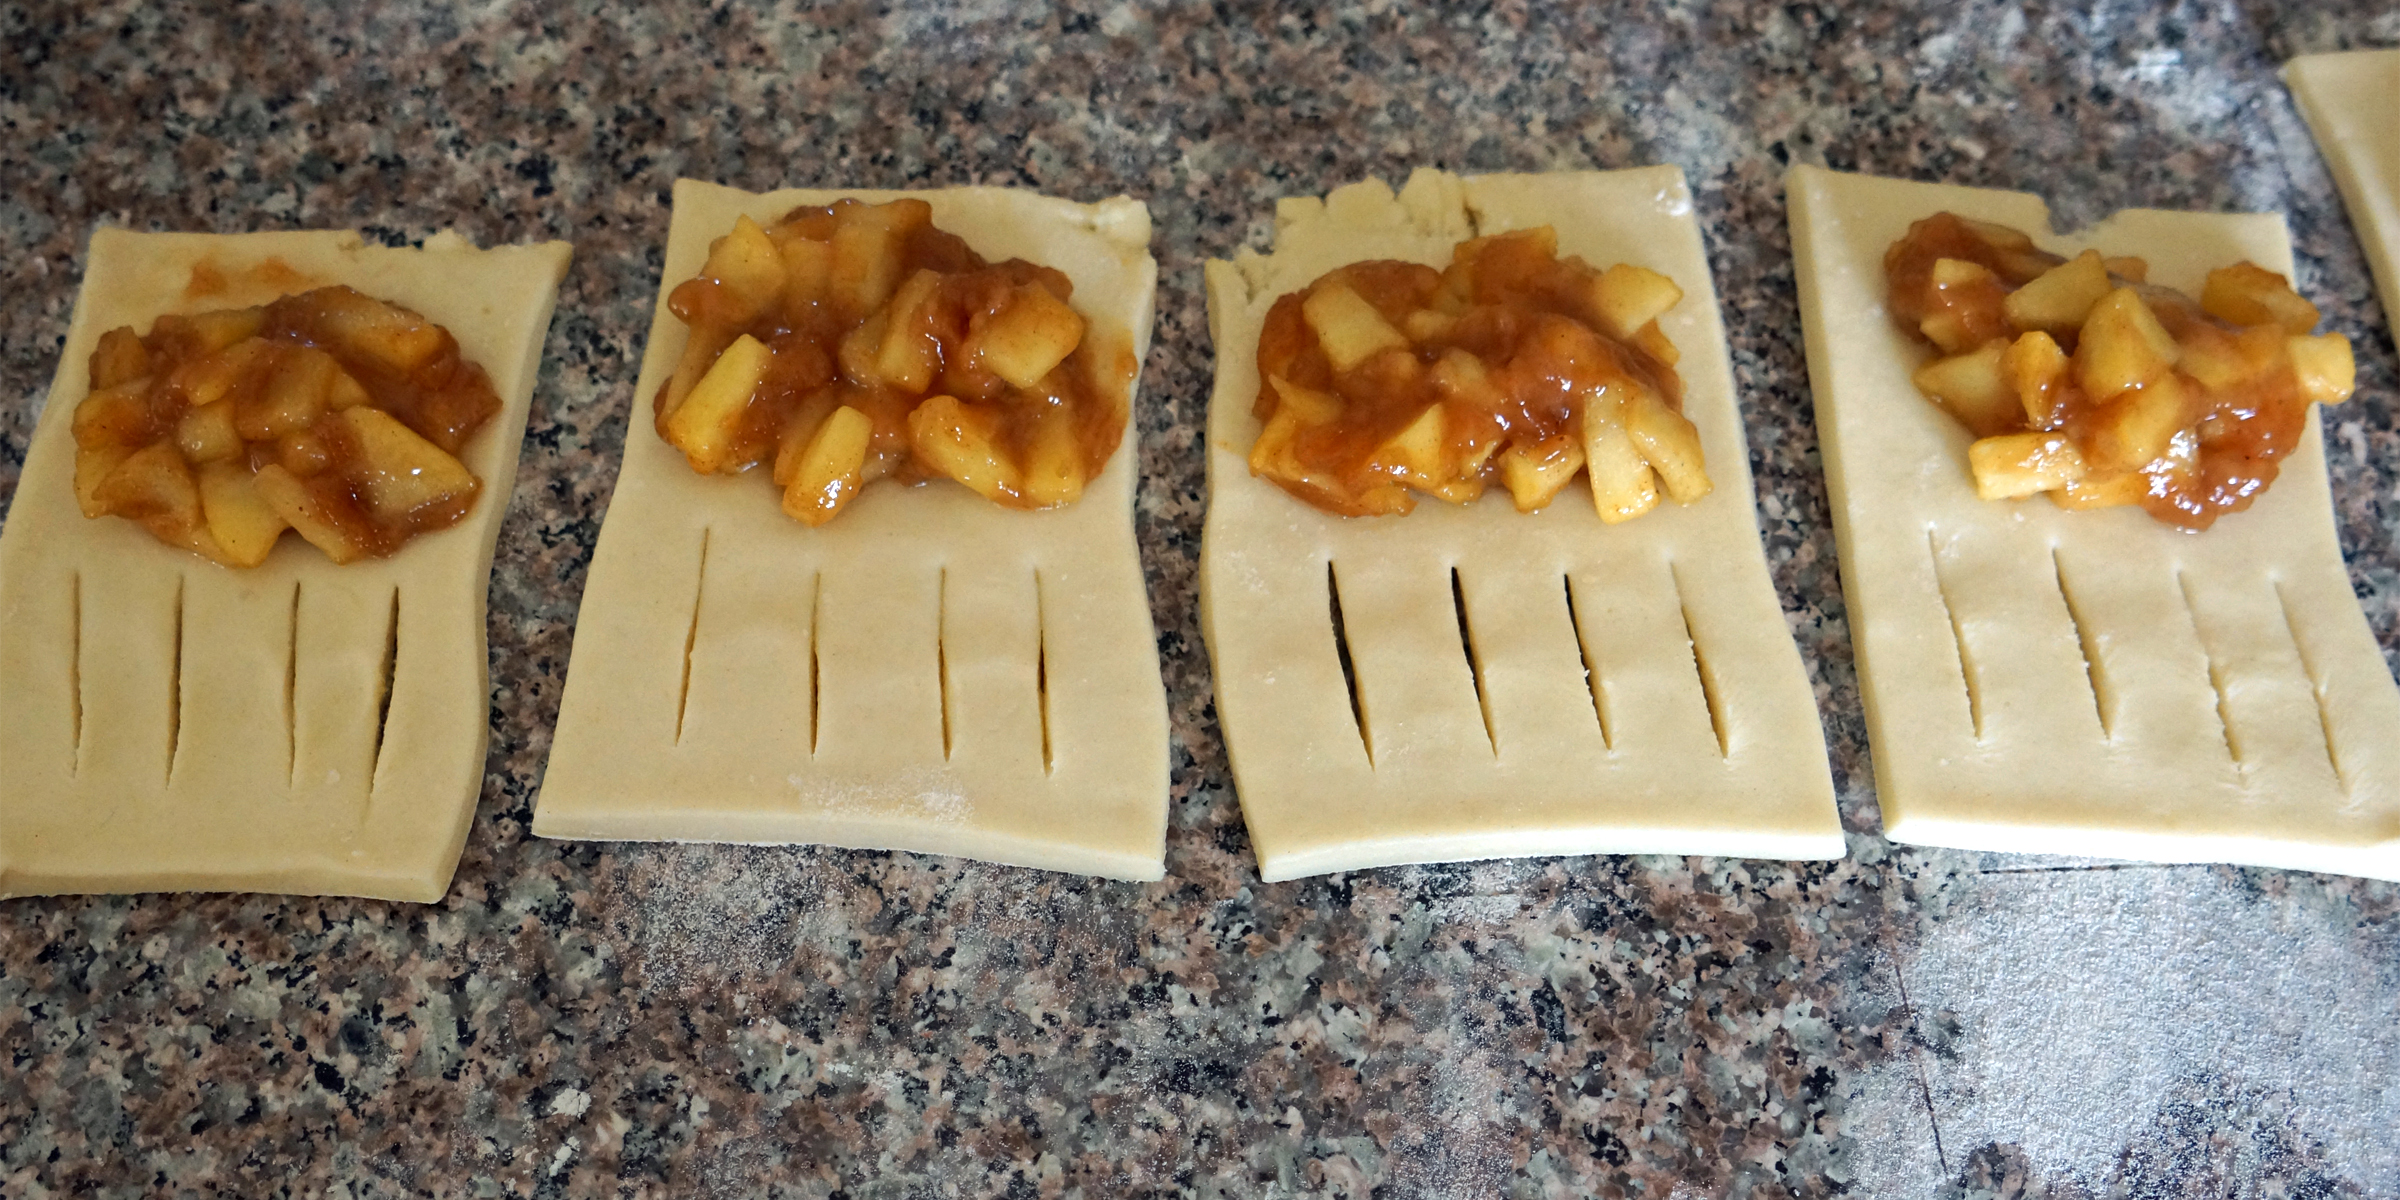
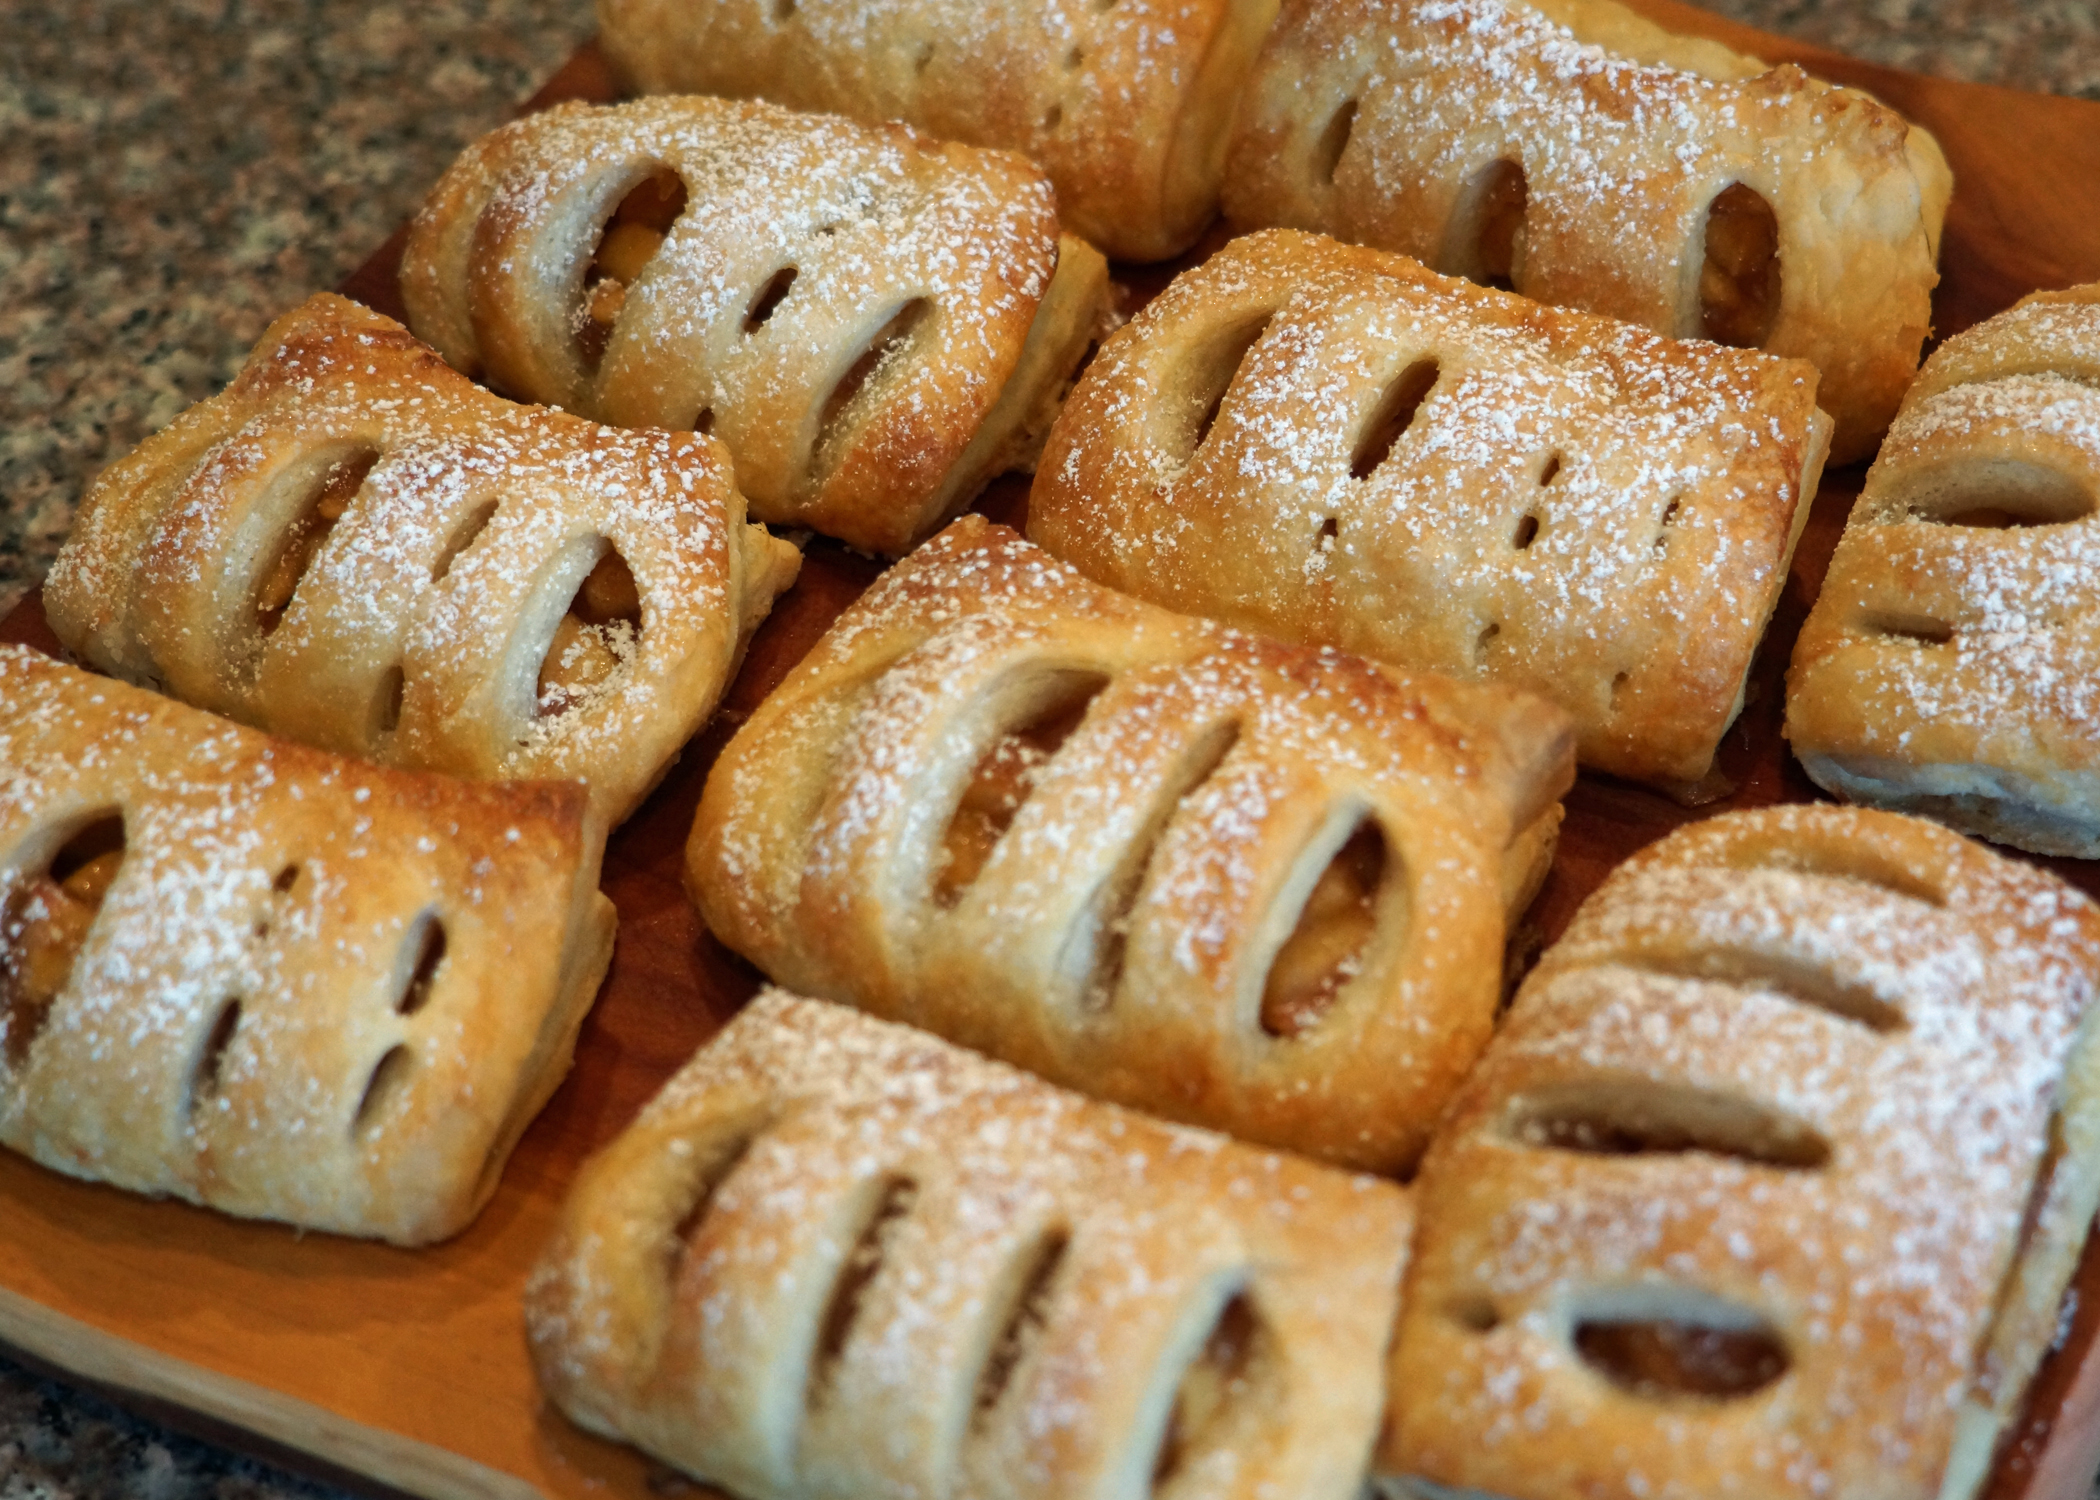
You can come up with your own shape and cut pattern. Be creative and make them pretty! Once you have put a dollop of filling on the dough and cut the slits, fold over the dough and tightly pinch the 3 open sides to keep all that yummy filling inside.
As soon as they are all filled and crimped, put them back in the frig for at least 30 minutes. Preheat your oven and, when it is ready, brush the pastries with egg wash and sprinkle on some sugar, if desired. Then bake and enjoy!
These are really just mini apple pies and there is no bad time to have apple pie! So enjoy for breakfast, lunch, dinner, or midnight snack! I mean, it’s fruit, right?
Apple Claws Recipe
For puff pastry, follow Anna Olson’s recipe. Use 1/3 of the puff pastry for this recipe.
For the filling:
- 3 medium Honeycrisp Apples, peeled, cored and diced
- 1/2 cup brown sugar
- 4 tablespoons butter
- 3 tablespoons all
- purpose flour
- ¼ tsp nutmeg
- ½ tsp cinnamon
- Pinch of salt
- 1 egg, lightly beaten with 1 tsp water
- Sugar for sprinkling, if desired
Directions:
- First, make the filling. Put all ingredients in a skillet and cook on medium heat until the apples soften, about 10-12 minutes. Remove from heat and cool completely.
- Roll out the puff pastry into a rectangle approximately 10”x15”. Cut into rectangles that are approximately 5”x3”.
- Drop about 1 tablespoon apple filling onto one half of the dough. Cut several slits on the other half of the dough as pictured.
- Fold dough over the apple filling and pinch together the 3 open edges. Place pastries on baking sheet lined with parchment paper.
- Immediately refrigerate the filled pastries for at least 30 minutes.
- Preheat the oven to 375°. Once the oven is hot and the pastries are chilled, brush them with egg wash and sprinkle with sugar, if desired.
- Bake for 25 to 28 minutes or until golden brown. (Start checking them at about 20 minutes by peeking through the oven door. You don’t want to open the door too often because you will lose too much heat!)
- Cool on the baking sheet for 10 minutes and then remove to a wire rack to cool completely. You can dust with powdered sugar or drizzle on a glaze if desired but these are so good, you don’t need it!
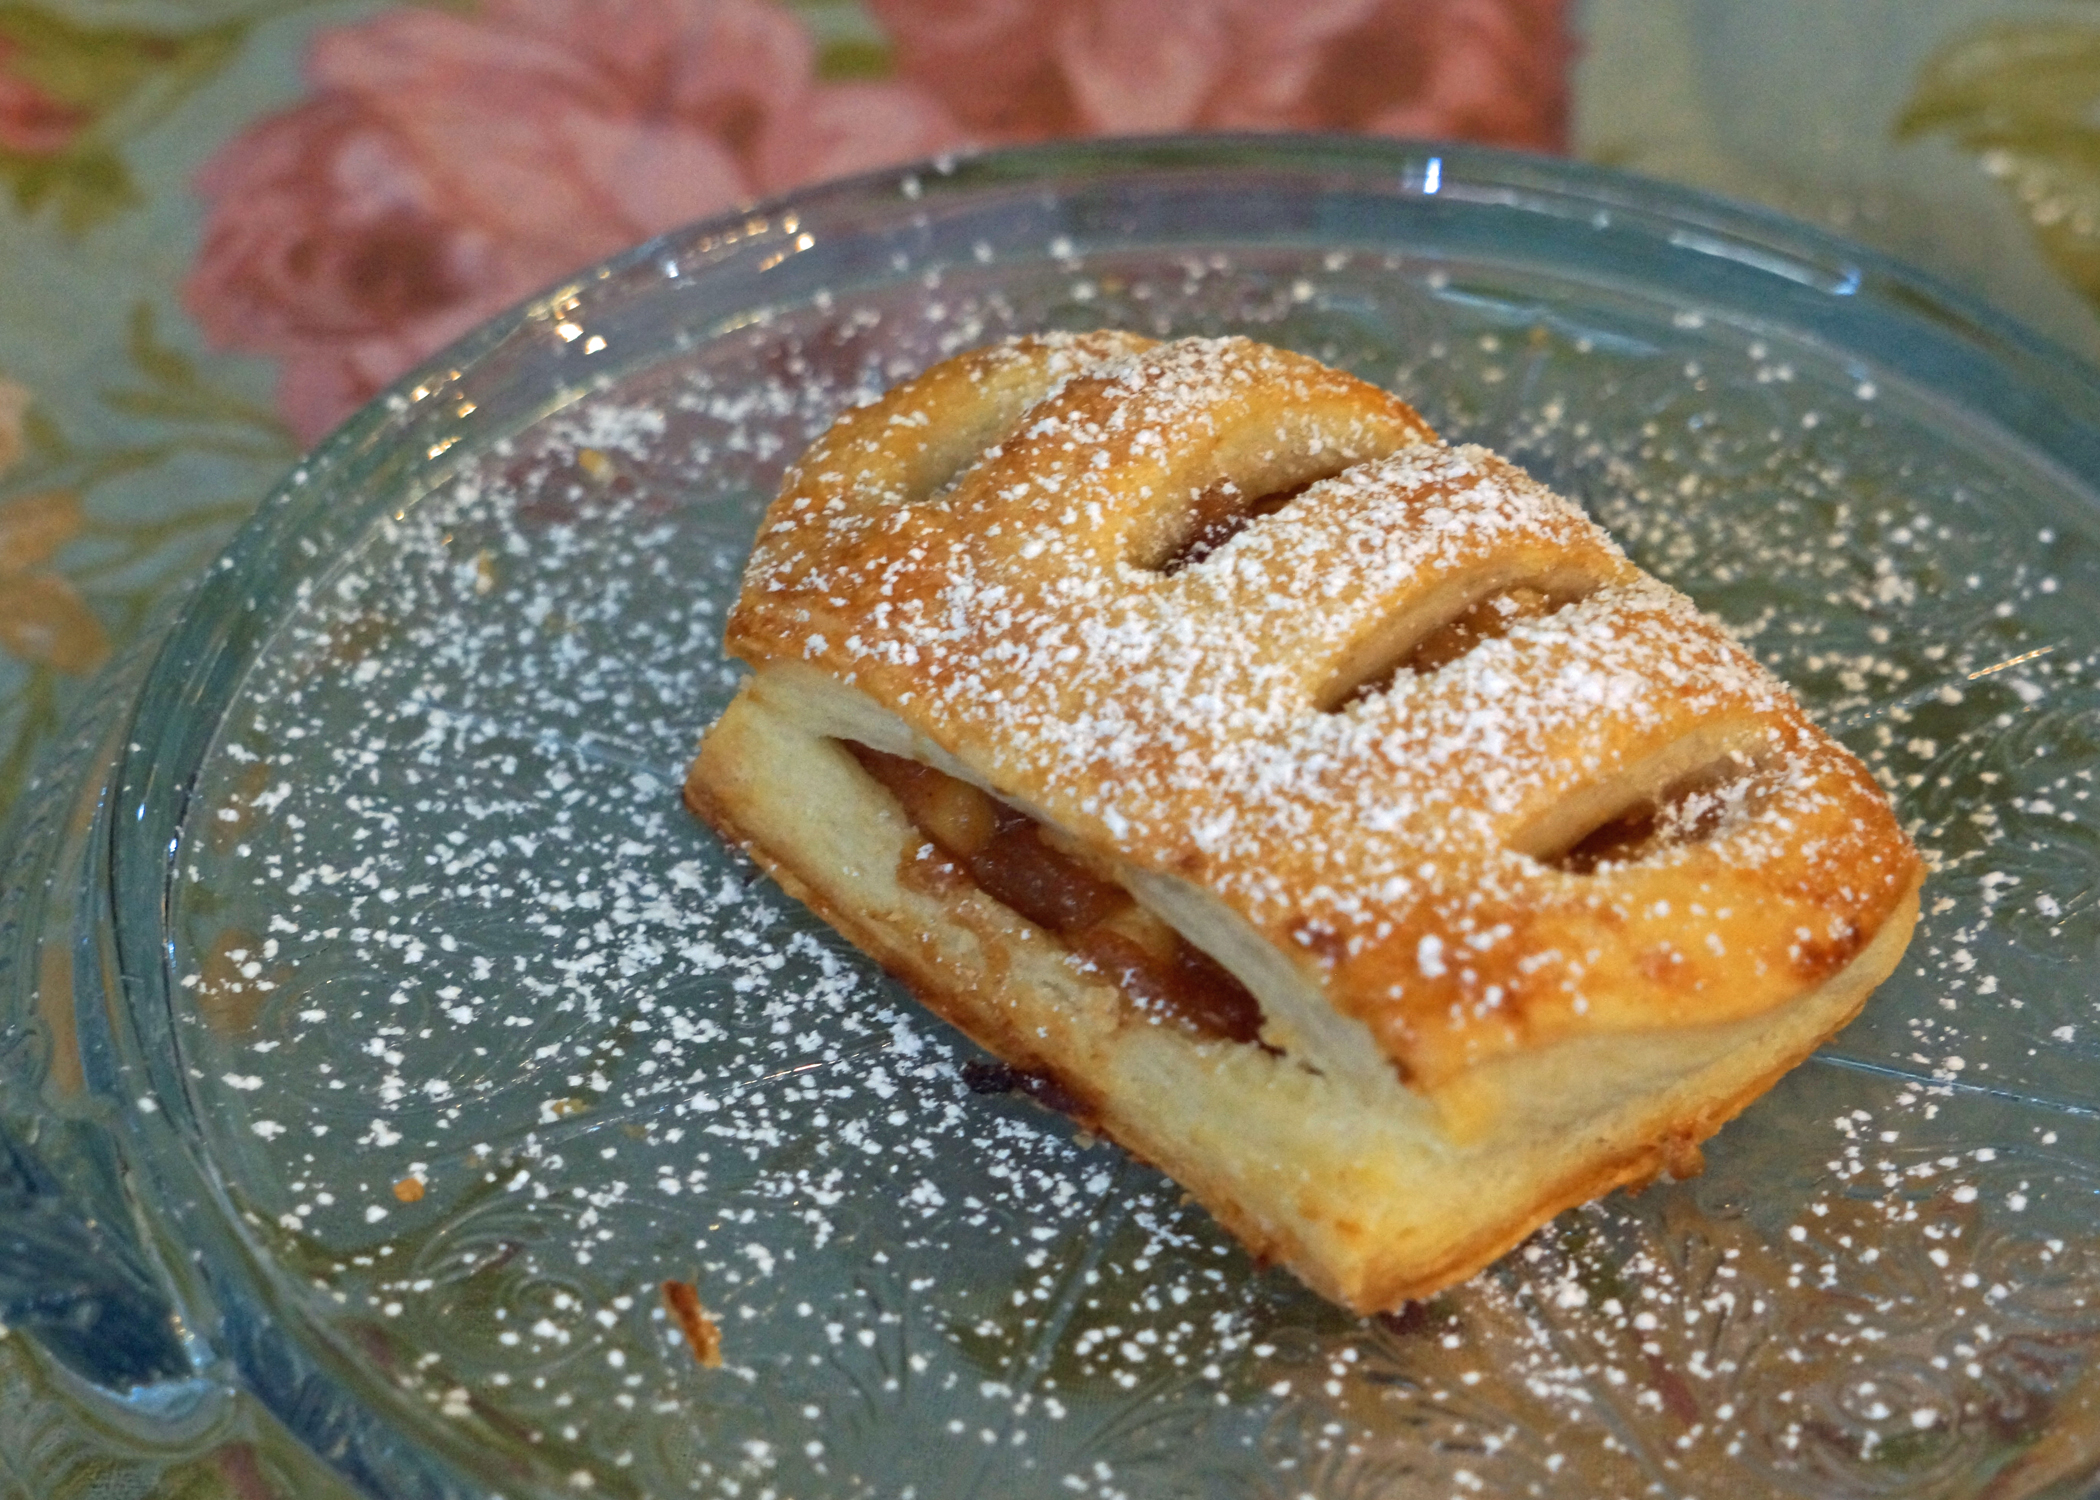
You can see here that I didn’t crimp the side of this pastry and it came apart as the dough puffed during baking. It’s OK if that happens! As long as you haven’t overstuffed the dough, the filling will not go too far and I don’t mind the slight imperfection!
